Following up on my previous post about the Home Assistant controlled garage door, I want to show my simple solution to controlling a light with HA. My house is a few years away from its centennial birthday. With that age come some interesting “features”, like knob and tube wiring, and always on lights with physical switches per fixture, and lots of other tidbits. The individual switches were a bit annoying and the old fixtures were quite ugly. Besides, controlling the lights with Home Assistant is a great as it gives you infinite flexibility with automations and voice assistant integrations. The Sonoff Basic is a great little wifi switch that’s easily flashed with your custom firmware of choice to keep all of the control local and out of the nasty cloud. As I mentioned before, ESPHome has become my goto for anything that is ESP8266 or ESP32 controlled. It’s ease of use, flexibility, and rapid development (massive thanks to OttoWinter) make it the best firmware option for me.
Parts List
- Sconce light fixture – Simple unswitched wall sconce [HomeDepot | Amazon]
- LED bulb – Make sure it’s 110v to match your house voltage and fits your fixture’s bulb socket [ Amazon ]
- Sonoff Basic – The wifi controlled switch that will simulate the previous physical switch [ Amazon ]
- FTDI Programmer – I like the micro USB one with the 3.3v/5v selection jumper [ Amazon ]
- Ferrules and Crimper – These are great for preventing wire strands from going crazy when pushing them into the terminals and make your job look very professional [ Amazon ]
- Hot glue gun – You probably have one of these, I just upgraded my 20 year old one to this one [ Amazon ]
DIY
Again, I’m not going to go through the details of setting up ESPHome. You can watch either Rob’s or digiblur’s videos to get a good explanation on it. Once you have it up and running, you will need to create a new device by populating the name and WiFi details. Here is my config:
|
1 2 3 4 5 6 7 8 9 10 11 12 13 14 15 16 17 18 19 20 21 22 23 24 25 26 27 28 29 30 31 32 33 34 35 36 37 38 39 40 41 42 43 44 45 46 47 48 49 50 51 |
esphome: name: esphome_light_sconce_right platform: ESP8266 board: esp01_1m wifi: ssid: 'insert' password: 'your_own' fast_connect: on api: ota: web_server: port: 80 logger: binary_sensor: - platform: gpio pin: number: GPIO0 mode: INPUT_PULLUP inverted: True id: sonoff_button internal: true on_press: - light.toggle: light output: - platform: gpio id: sonoff_relay pin: number: GPIO12 light: - platform: binary name: "Sconce, Right" id: light output: sonoff_relay switch: - platform: restart name: 'Sconce, Right REBOOT' status_led: id: status_led pin: number: GPIO13 inverted: True |
The components above include
- A binary sensor component for the button on the Sonoff Basic
- An output component for controlling the relay state
- A light component since you want this to show up as a light in HA
- A switch restart component to reboot the Sonoff
- A status LED component for indicating networking/error status on the Sonoff
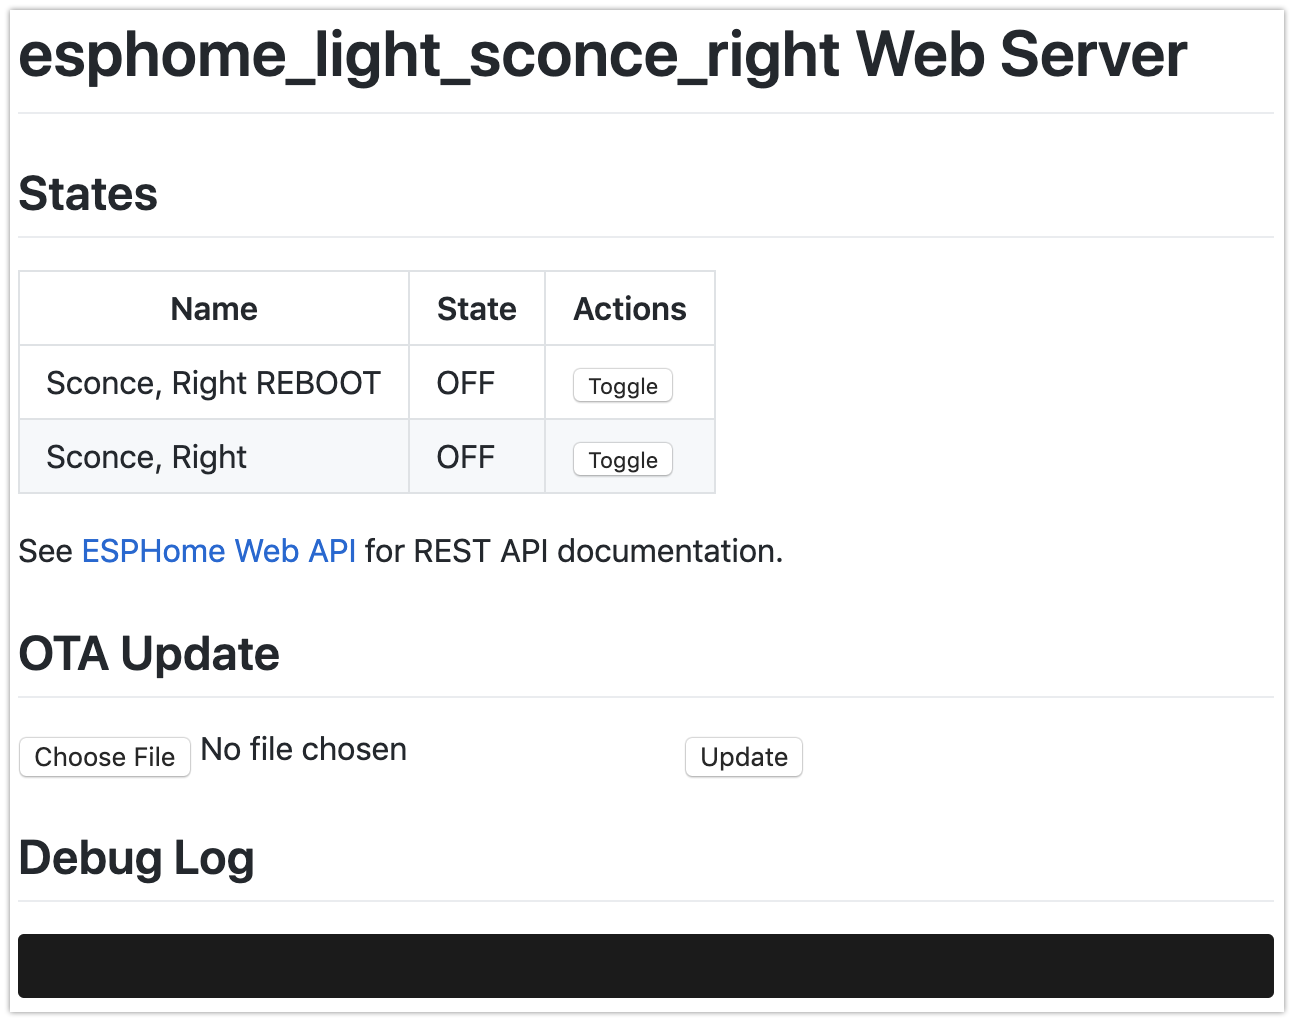
Now can compile the firmware and flash it to your Sonoff Basic. The FTDI adapter only needs four wires connected to the Basic: VCC, GND, RX, TX. Again, if you’re not familiar with how to do this, reference the videos linked above. Once it’s flashed, power cycle the device. Now you should be able to open the web GUI for the device by either going to it’s IP or going to esphome_light_sconce_right.local in your browser. If the page loads, you’ve done everything correctly up to this point. Since the Basic’s relay needs line power to operate, you will need to disconnect your FTDI programmer and connect it your mains power. Remember, this is mains voltage, so be careful and if you’re not comfortable with this, put the unit back in its case before proceeding. After the Basic powers up, you should be able to test out the light switch by hitting the button on the web UI.
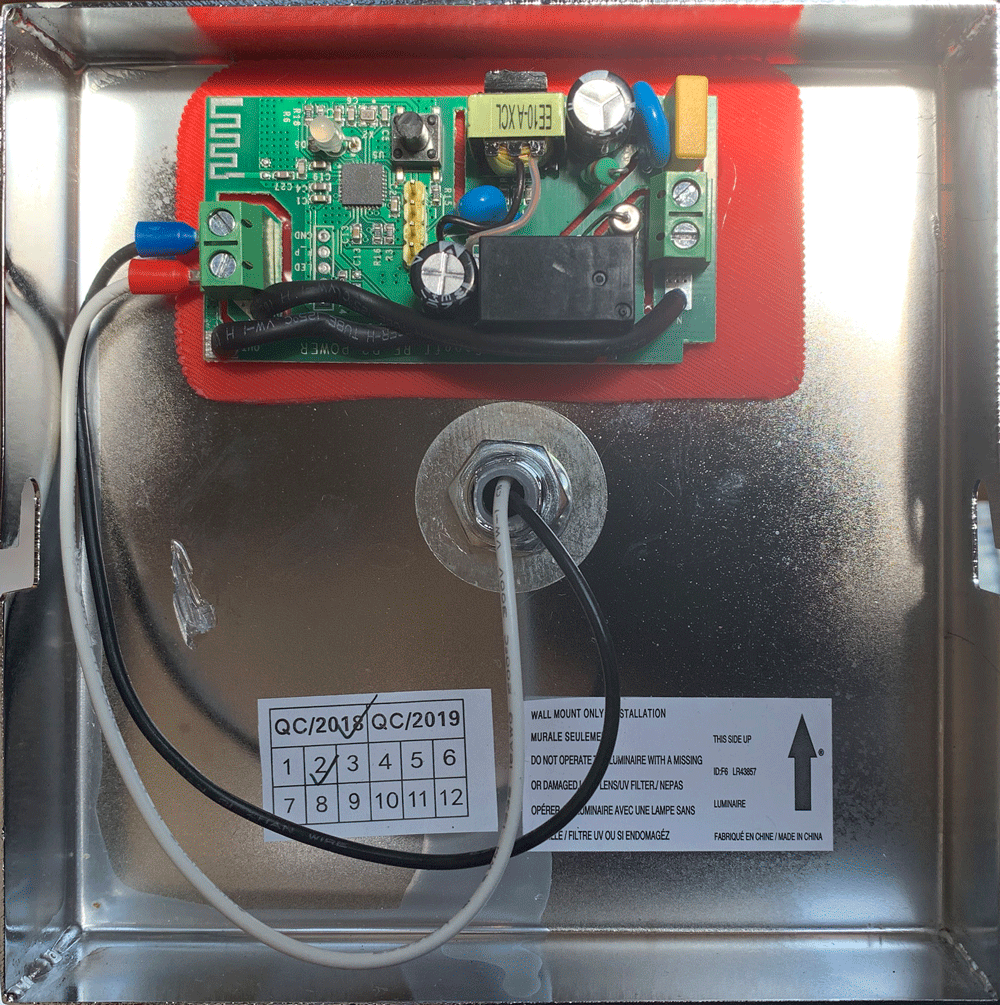
Now I needed to mount the Basic inside of my sconce. Part of the reason that I picked this sconce fixture was that I thought it had plenty of room in the base. Unfortunately, I was almost right except for the LED and push button that were just a hair too long. So I used my Dremel rotary tool’s cutoff disc to cut the button down to about half length and resoldered the LED a 1/4″ lower into the PCB. In order to insulate the bottom of the PCB from the metal sconce, I used a plastic raft that I had sitting around form a previous 3D print. Alternatively, you can use the bottom of the Basic’s case or anything else that’s non conducting. For me, the case was a bit wider than I liked and I had the raft sitting there. I used hot glue to attach the raft to the sconce, and the Basic to the raft. The last step was to put ferrules on the sconces wires and plug them in. Then I did a final bench test: first with the Basic connected to mains to make sure it was working by hearing the relay click, and finally plugging in the bulb into the fixture’s socket to make sure it lit up. Now, just install it based on the directions from your fixture, and turn on the breaker (fuse in my case).
To integrate it into Home Assistant, you will need to go to configuration > integrations. Assuming you have discovery enabled, you will have a new ESPHome device, click configure and add it to your system. If you don’t have any existing conflicting entities, your entity names should match the ones I have. I’m using lovelace with the following config:
|
1 2 3 4 5 6 7 8 9 10 11 12 13 14 15 16 17 18 19 20 21 22 23 24 25 26 27 28 29 30 31 32 33 34 35 |
- type: horizontal-stack cards: - type: entity-button name: Crown Molding icon: mdi:crown tap_action: action: call-service service: light.toggle service_data: entity_id: light.crown_molding hold_action: action: more-info entity: light.crown_molding - type: entity-button name: Sconce Left icon: mdi:wall-sconce tap_action: action: call-service service: light.toggle service_data: entity_id: light.sconce_left hold_action: action: more-info entity: light.sconce_left - type: entity-button name: Sconce Right icon: mdi:wall-sconce tap_action: action: call-service service: light.toggle service_data: entity_id: light.sconce_right hold_action: action: more-info entity: light.sconce_right |
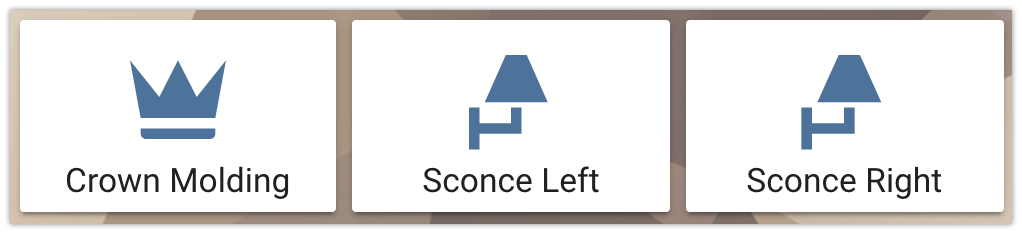
This provides you with a simple button row who’s icon shows you the state of the lights.
I’ve exposed these lights to my Google Assistant integration. So I just walk into the living room and say “Hey Google, turn on the sconces” and they fire right up.
Be First to Comment