
Last updated on August 31, 2024
A while back, we decided to rearrange our living room, get new furniture, etc. I took this opportunity to expand my home automation addiction and pull more items into Home Assistant. My plan included running wiring through the ceiling for power and audio, automating my projector, screen, and subwoofer. This how-to will outline how I’m controlling the power of my remotely mounted subwoofer all from a one-word activation with my Google Home, but more on that in another post. This is the first of multiple posts for automating my home theater experience.
Hardware
While my subwoofer’s power switch has an auto setting that is only supposed to turn on the amp when it’s getting signal from the receiver, this never really worked. And as we rearranged the room, it’s new location did not allow it to be wired into the receiver’s builtin switched receptacle. Thus, I needed a way to remotely control the sub being on or off.

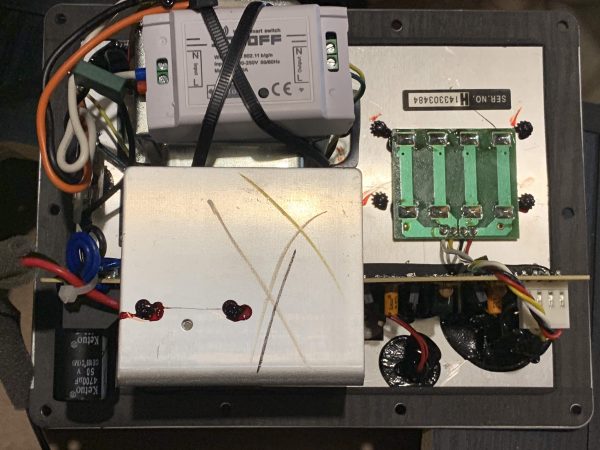
The Sonoff Basic is perfect for this job as you are switching 120v for the subwoofer’s power. It does not matter which version of the Sonoff Basic you use (Original, R2, or R3) as they will perform the same here. I have a half dozen R2s that came as part of a bulk order, so that’s what I used. Splicing the Sonoff into the subwoofer’s power cable was very straight forward. All you have to do is cut the cable and insert the Sonoff in the middle, with the plug side of the cable wired to the input side of the Sonoff and the subwoofer side to the output side.

I chose to take a step further by disassembling my subwoofer and installing the Sonoff inside of the subwoofer. This means it’s spliced on the power cable after the cable enters the subwoofer. I used a couple of strong zip ties to mount the Sonoff, in its enclosure, to one of the sub’s metal components.
Firmware
The overall process is to flash this unit with custom firmware that tightly integrated to Home Assistant. To get the unit converted from the original firmware, I used a USB FTDI converter combined with ESPHome to get this accomplished. If you are not familiar with this process, JuanMTech and many others have great detailed steps for this part. Head over to your ESPHome dashboard and create a new device. Paste the YAML below into the device configuration:
substitutions:
  platform: ESP8266
  board: esp01_1m
  device_name: esphome_subwoofer
  friendly_name: "Subwoofer"
  reboot_timeout_wifi: 900s
  reboot_timeout_api: 1800s
  output_power: 17dB

# <<: !include z_common.yaml

esphome:
  platform: ${platform}
  board: ${board}
  name: ${device_name}
  esp8266_restore_from_flash: true

wifi:
  ssid: !secret wifi_iot_ssid
  password: !secret wifi_iot_pwd
  fast_connect: on
  reboot_timeout: ${reboot_timeout_wifi}
  output_power: ${output_power}
  ap:
    ssid: "AP_${friendly_name}"
    password: !secret wifi_backup_pwd

api:
  reboot_timeout: ${reboot_timeout_api}

ota:

web_server:
  port: 80

logger:

captive_portal:

binary_sensor:
- platform: gpio
  pin:
    number: GPIO0
    mode: INPUT_PULLUP
    inverted: True
  id: sonoff_button
  internal: true
  on_press:
    - switch.toggle: sonoff_relay

switch:
- platform: restart
  name: '${friendly_name} REBOOT'

- platform: gpio
  name: "${friendly_name} Power"
  icon: "mdi:speaker"
  id: sonoff_relay
  pin:
    number: GPIO12
  restore_mode: ALWAYS_ON

status_led:
  pin:
    number: GPIO13
    inverted: True

text_sensor:
  - platform: version
    name: ${friendly_name} ESPhome Version
Add the device to Home Assistant
Now, go to the Home Assistant Integrations page (Configuration>Integrations). You should see the ESPHome device show up in the discovered section after a minute or two. Click configure, and submit, and that’s it. Alternatively, you can manually add the device by clicking “CONFIGURE” on the ESPHome integration and entering “<NODE_NAME>.local” as the host.

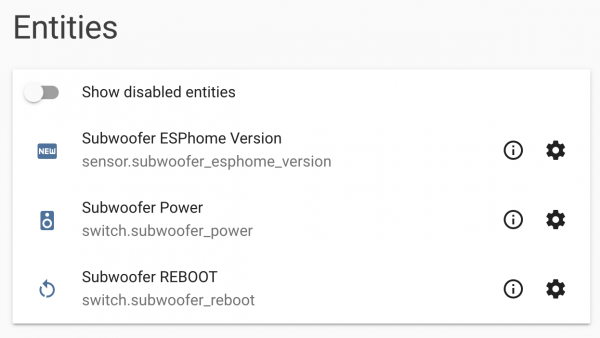
Once the device is added, it will be in the lower part of this page (under Configured). Clicking through to the device will show you the entity names that are auto-magically created by the ESPHome integration.
Node-RED Automation
Now, you cannot be expected to have to switch on the subwoofer through Home Assistant like a barbarian! So my fix for this is to automate it with the state of my receiver’s power. This is a very easy automation to create in Node-RED, my automation engine for Home Assistant.

This automation is looking for any messages about the on/off state of my receiver (media_player.rx_v675) and then outputs that state through an on/off switch (splitter). If the receiver state becomes on, the flow calls to turn on the subwoofer switch to on. You can copy and paste the JSON flow below to import it into your Node-RED instance.
[{"id":"cf3c6f80.3beae","type":"server-state-changed","z":"57657673.d86dd8","name":"Receiver state","server":"c75798f0.9eb148","version":1,"entityidfilter":"media_player.rx_v675","entityidfiltertype":"exact","outputinitially":false,"state_type":"habool","haltifstate":"","halt_if_type":"str","halt_if_compare":"is","outputs":1,"output_only_on_state_change":true,"x":120,"y":890,"wires":[["67b8934a.8ffaec"]]},{"id":"67b8934a.8ffaec","type":"switch","z":"57657673.d86dd8","name":"on / off","property":"payload","propertyType":"msg","rules":[{"t":"true"},{"t":"false"}],"checkall":"true","repair":false,"outputs":2,"x":350,"y":890,"wires":[["2e23fe27.8fa362"],["6b0f2645.bdd0a8"]]},{"id":"2e23fe27.8fa362","type":"api-call-service","z":"57657673.d86dd8","name":"Turn on sub","server":"c75798f0.9eb148","version":1,"service_domain":"homeassistant","service":"turn_on","entityId":"switch.subwoofer_power","data":"","dataType":"json","mergecontext":"","output_location":"","output_location_type":"none","mustacheAltTags":false,"x":580,"y":860,"wires":[[]]},{"id":"6b0f2645.bdd0a8","type":"api-call-service","z":"57657673.d86dd8","name":"Turn off sub","server":"c75798f0.9eb148","version":"1","service_domain":"homeassistant","service":"turn_off","entityId":"switch.subwoofer_power","data":"","dataType":"json","mergecontext":"","output_location":"","output_location_type":"none","mustacheAltTags":false,"x":580,"y":920,"wires":[[]]},{"id":"c75798f0.9eb148","type":"server","z":"","name":"Home Assistant","legacy":false,"hassio":false,"rejectUnauthorizedCerts":false,"ha_boolean":"y|yes|true|on|home|open","connectionDelay":true}]Concerns
I had some initial concerns that the Sonoff would be subjected to stress/interference that could make it work incorrectly or breakdown faster. However, after making this modification last May, I’ve had zero issues with this setup. It just works. If you’ve got any questions, feel free to ping me below.
Be First to Comment